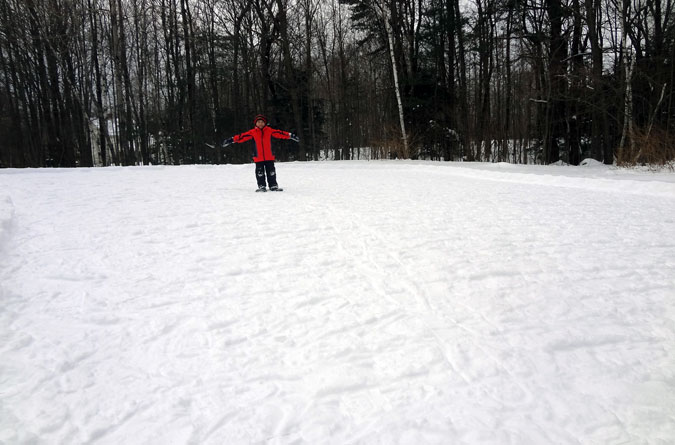
I’ve always wanted to make an igloo and camp out. Inspired by an article in my son’s Boy’s Life magazine, I figured it was time to check-off this winter bucket list item. So for this adventure my eldest son and I traveled to the deepest, darkest, New Hampshire forest—okay, alright, it was our backyard. Cut me some slack, my eldest son is six, so we needed a bailout plan.
The entire process of building an igloo should take a full day, but for us, it was three weeks (more on this to come)—another good reason we were in the backyard. To build an igloo you will need:
- Tons of snow (obviously)
- Snowshoes to pack down the snow
- A square shovel
- A good, small hand saw
- An unnatural amount of patience, especially if attempting the project with a six-year-old
- At least one other full-sized human being
The last two items are key. It turns out that a six-year-old isn’t the best partner in this project, unless, of course, you want the conversation to digress as follows:
“Sorry, Buddy, the saw is a Daddy-only tool.”
“Hey, what did I tell you about the saw?”
“I’m serious, packing snow in the cracks is the most important job.”
“You’re not a ninja turtle. Stop swinging the saw like a sword.”
“Please don’t let your mother see you doing that with the saw.”
“What did I tell you about your mother? We have to go in now.”
You probably get the point, so without any further ado, let’s get to work:
Step 1: Snowpack
Pack down a large area of snow using snowshoes (or cheat with a snowmobile). You’ll want to go over each spot at least three times to get the snowpack good and hard. Our base was about eight inches thick once packed.


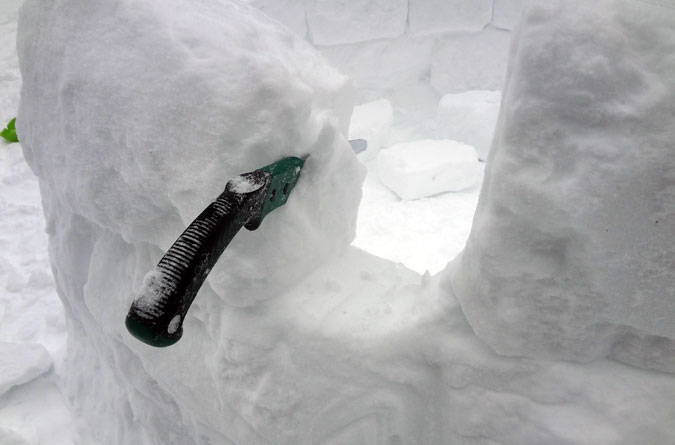
Step 2: Block Cutting
The blocks we cut were a little bit taller than a foot, and about two feet long, which for the most part was a good size. Since we were in our backyard, I had the benefit of using an ice scraper to measure and cut the blocks, and then the shovel was used to pry them free.
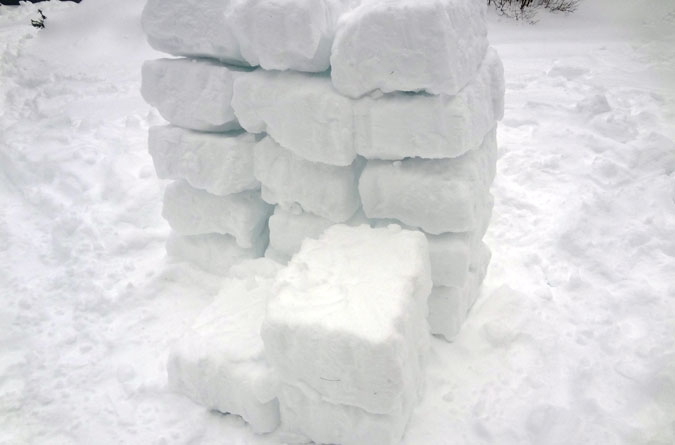
Having only one adult made this part of the process long and tedious. To break it up I cut enough blocks for one row of the igloo, placed them, then went back to cutting. Ideally, if you have two to three full-sized people, you could significantly speed things up by turning the blocks-to-build process into an assembly line.
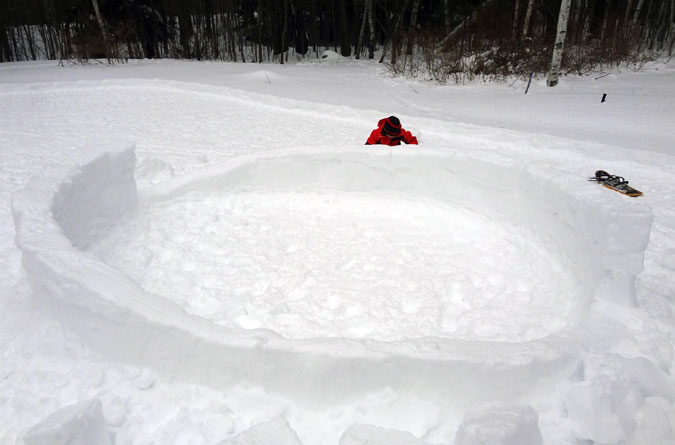
Step 3: Build the Base
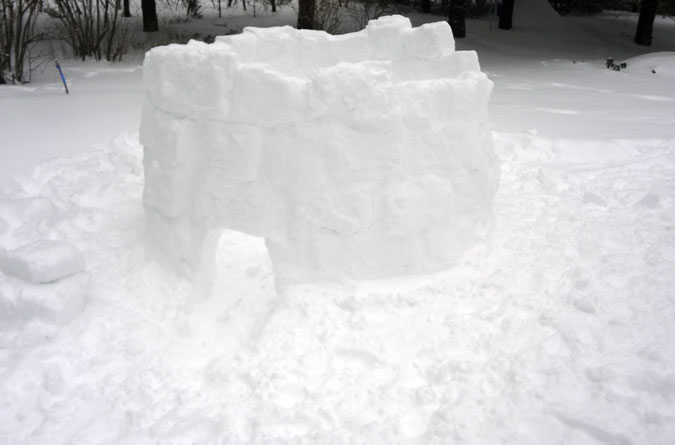
Line the blocks up on their side in a circle to build the base. The circle should be just big enough for you to lay down in the middle, which, if done properly, should culminate in an igloo that’s about five feet tall.
It’s worth admitting that the circumference of my first attempt was way too big; it wasn’t until I got the walls to shoulder height that I realized the thing would be twenty feet tall before enclosure. Needless to say, day one ended long after my son retreated to the warmth of the house, myself ensconced in the pity of self-defeat.
The second attempt at the base still ended up being a little big, but it was at least manageable. We put down two rows of blocks, one on top of the other, filled in all cracks, and gave it time to harden, before properly cutting the base.
To cut the base, you want to visually halve it and cut down on a gradual slope from the top of one half to its bottom. Do the same with the second half, starting the top where the bottom of the first half ended. This is a crucial step in the structural integrity of the igloo. Once the two halves are set, cut the top of the base in at a slight angle so that the next row starts to lean toward the center.
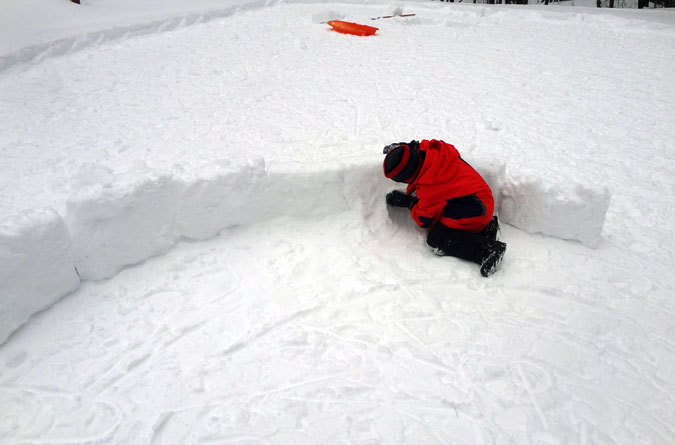
Step 4: Build the Walls
Start each row at the low point of the spiral and trim the blocks so they fit snugly one into the other. This can be tricky, and gaps aren’t the end of the world as you can fill them in afterward. It’s remarkable how the blocks hold as they’re slid into place. After each row is laid, cut the downward angle along the top for the next row.
It’s best to lay the blocks from inside the igloo to keep them from falling inward as placed. This part of the process is also where it would have been tremendously helpful to have a second adult involved. The issue is that the previous row built can be a little unstable if another row is immediately built on top, resulting in tumbling.
Since I didn’t have another adult to help hold blocks in place, the solution I devised was to build a row, pack it in with snow, and then leave it to set. The setting should only take an hour or so, but for me, that really meant the next day/week…thus this turned into a three-week project.
Once the wall is too tall to step over, you’ll need to cut an entrance. Instructions on how to do this “correctly” are below.
Step 5: Construct the Roof
Keep angling each row in as before and eventually the pieces will meet in the middle. Because my base was too wide, I ended up needing a small step ladder to complete the roof.

The last few pieces of the roof will likely need to be cut to fit the available space, and you’ll want to pack snow into the cracks for stability and peace of mind. Once the roof has had time to harden, cut a small air hole into it.

Step 6: Create the Entrance
A proper entrance should have a trench that starts well outside of the igloo and burrows under the wall, coming up from the floor on the inside. The ability to do this “correctly” depends somewhat on the snowpack beneath the igloo. The trench should also be enclosed with snow blocks.
While our opening did go down and then up, we didn’t bother building a longer, enclosed trench. This was a mistake, as it caused the igloo to get colder inside.
Step 7: Camp Out
If you’re fortunate to camp out on the same day as the igloo was constructed, you’ll want to change any wet or sweaty clothes, because these will pull heat from your body. While you’ll want to have a sub-freezing sleeping bag, it’s important to know that the temperature ratings on those are assuming you’ll be wearing clothes. So wear clothes, and dress in layers.
The base layer should be something that pulls moisture away from your body such as EMS’ Techwick series. If you get cold easily, you might want to consider two long-john layers on your legs. I’d finish the legs off with fleece sweatpants or a nice softshell pant such as these fleece-lined pants from Mountain Hardwear. If you start getting hot, shed a layer before sweating.
On top you’ll want a mid-weight layer of fleece or merino wool, with the best option for a third layer being a down jacket, because it also makes a nice pillow if you’re too hot to wear it. Lastly, wear a good winter hat and mittens, and pack hand and toe warmers.
For our sleeping area we laid down a survival blanket to reflect heat back to us. My son got the inflatable Therm-A-Rest sleeping pad and I used a Therm-A-Rest solar sleeping pad. Keep in mind that it’s not a good idea to use the inflatable pad directly on the snow as the air inside will get cold and transfer that uncomfortableness to you. It’s not a bad idea to use both, the solar pad on the bottom with the inflatable pad above it.
Unfortunately, I only had one sleeping bag rated for below freezing, so my son got that and I made do with a 32-degree bag. It was 15 degrees out when we went to the igloo with an overnight low of one degree, I’d built the igloo too tall, and the entrance wasn’t properly enclosed…so, well, you can probably do the math.

So, how’d we fare? My son made it to 12:30 before asking to go in. He insisted that he wasn’t cold and just missed being inside (good thing we were in our backyard). I was getting a bit chilly and had thrown a spare sleeping bag over us prior to his asking to go inside. After tucking him into his bed in the house, I returned to the igloo and finished the night fine in the good sleeping bag.
The next morning my son told me he wanted to do it again. It might be time to fix the entrance.
Your point of view caught my eye and was very interesting. Thanks. I have a question for you.
I don’t think the title of your article matches the content lol. Just kidding, mainly because I had some doubts after reading the article.
I enjoy your writing style truly loving this site.
Can you be more specific about the content of your article? After reading it, I still have some doubts. Hope you can help me.
I don’t think the title of your article matches the content lol. Just kidding, mainly because I had some doubts after reading the article.
Can you be more specific about the content of your article? After reading it, I still have some doubts. Hope you can help me.
Your point of view caught my eye and was very interesting. Thanks. I have a question for you.
Thank you for your sharing. I am worried that I lack creative ideas. It is your article that makes me full of hope. Thank you. But, I have a question, can you help me?
Thanks for sharing. I read many of your blog posts, cool, your blog is very good.
Can you be more specific about the content of your article? After reading it, I still have some doubts. Hope you can help me.
Thanks for sharing. I read many of your blog posts, cool, your blog is very good.
The primary benefit of UP Manav Sampada is the seamless online leave application and approval process for all government staff, including teachers. This system reduces bureaucracy and provides real-time tracking, making administrative tasks far more convenient. The mSTHAPNA mobile app further enhances this accessibility for employees on the go.
The mention of the Maine Warden Service’s “coming of age” before GPS devices really highlights how much reliance we place on technology now. I wonder if that forced ingenuity and a deeper connection to the land itself? I’d be curious to hear more about specific survival skills they relied on back then.
好文!2026年世界杯越来越近了,让我们共同期待这场全球足球盛宴。日期:2025-11-13 22:48:26 (-03)。
The simple, fast-paced nature of color prediction is the core appeal of the Okwin game, making it highly addictive for users seeking quick engagement. Players often focus on analyzing result patterns to inform their next bet, adding a layer of pseudo-strategy to the inherently random structure of the Okwin game.
好文!2026年世界杯越来越近了,让我们共同期待这场全球足球盛宴。日期:2025-11-16 21:40:40 (-03)。
This post was exactly what I needed—thank you for writing it!
This post was exactly what I needed, and I’m so grateful you took the time to write it.
Your engaging writing style makes learning a joy, and every visit to your blog leaves me with something new and valuable.
愛海外版,專為華人打造的高清視頻官方認證平台,支持全球加速觀看。
中華職棒台灣球迷的首選資訊平台,提供最即時的中華職棒新聞、球員數據分析,以及精準的比賽預測和數據分析。
Hey! I just wanted to ask if you ever have any problems with hackers? My last blog (wordpress) was hacked and I ended up losing many months of hard work due to no back up. Do you have any methods to protect against hackers?
I was excited to uncover this great site. I want to to thank you for ones time due to this wonderful read!! I definitely savored every part of it and i also have you book marked to look at new stuff in your website.
Thank you for the auspicious writeup. It in fact was a amusement account it. Look advanced to more added agreeable from you! However, how could we communicate?
Lille 0-1 Crvena Zvezda 2026 Europa League surprise! Red Star shock French side – football news full of underdog glory!
Thank you for your sharing. I am worried that I lack creative ideas. It is your article that makes me full of hope. Thank you. But, I have a question, can you help me?
Hello, I enjoy reading through your article post. I wanted to write a little comment to support you.
This website was… how do you say it? Relevant!! Finally I’ve found something which helped me. Cheers!
You actually make it seem so easy with your presentation but I find this topic to be really something which I think I would never understand. It seems too complex and extremely broad for me. I’m looking forward for your next post, I will try to get the hang of it!
Hello i am kavin, its my first occasion to commenting anyplace, when i read this article i thought i could also make comment due to this sensible piece of writing.
Have you ever considered creating an e-book or guest authoring on other websites? I have a blog based upon on the same subjects you discuss and would really like to have you share some stories/information. I know my audience would enjoy your work. If you’re even remotely interested, feel free to shoot me an e mail.
Thank you for your sharing. I am worried that I lack creative ideas. It is your article that makes me full of hope. Thank you. But, I have a question, can you help me?
Wow, wonderful blog layout! How long have you been blogging for? you made blogging look easy. The overall look of your web site is wonderful, as well as the content!
I like the valuable info you provide in your articles. I’ll bookmark your weblog and check again here regularly. I am quite sure I’ll learn many new stuff right here! Best of luck for the next!
Really enjoyed the step-by-step explanation of packing snow, cutting blocks, and slowly building the igloo walls before camping out. The patience you described reminded me of winter trips where even small routines like shaving outside require planning. I usually pack a rechargeable electric shaver with good battery life so I can manage my beard, stubble, and sideburns after a long day in the cold. A compact electric razor, beard trimmer, or electric trimmer with combs helps keep facial hair tidy around the face and neck, even for a quick dry shave. Some hikers prefer electric razors, others a razor and razor blade with lubricant to protect skin and stubborn hairs. Either way, gear planning—just like igloo building—takes patience a good barber would appreciate.
Hey there would you mind letting me know which hosting company you’re working with? I’ve loaded your blog in 3 different internet browsers and I must say this blog loads a lot faster then most. Can you recommend a good hosting provider at a reasonable price? Kudos, I appreciate it!
I go to see daily a few web pages and information sites to read articles or reviews, except this webpage gives quality based posts.
An intriguing discussion is definitely worth comment. I think that you ought to publish more on this topic, it might not be a taboo subject but generally folks don’t speak about such topics. To the next! Cheers!!
I was recommended this website by my cousin. I am not sure whether this post is written by him as nobody else know such detailed about my problem. You are amazing! Thanks!
Asking questions are truly pleasant thing if you are not understanding anything fully, except this article gives pleasant understanding yet.
It’s remarkable in support of me to have a site, which is useful for my know-how. thanks admin
Thank you for the good writeup. It in fact was a amusement account it. Look advanced to more added agreeable from you! However, how could we communicate?
I really like your blog.. very nice colors & theme. Did you create this website yourself or did you hire someone to do it for you? Plz reply as I’m looking to construct my own blog and would like to find out where u got this from. thanks a lot
Thank you for your sharing. I am worried that I lack creative ideas. It is your article that makes me full of hope. Thank you. But, I have a question, can you help me?
I was recommended this website by my cousin. I am not sure whether this post is written by him as nobody else know such detailed about my difficulty. You’re incredible! Thanks!
This piece of writing is truly a good one it assists new the web visitors, who are wishing for blogging.
Hello, i read your blog occasionally and i own a similar one and i was just curious if you get a lot of spam feedback? If so how do you protect against it, any plugin or anything you can suggest? I get so much lately it’s driving me mad so any assistance is very much appreciated.
Woah! I’m really enjoying the template/theme of this website. It’s simple, yet effective. A lot of times it’s tough to get that “perfect balance” between usability and visual appeal. I must say that you’ve done a great job with this. Also, the blog loads super quick for me on Internet explorer. Exceptional Blog!
I really like what you guys are up too. This sort of clever work and reporting! Keep up the amazing works guys I’ve included you guys to my personal blogroll.
I am extremely inspired with your writing talents as well as with the format on your blog. Is this a paid theme or did you modify it yourself? Either way stay up the nice quality writing, it’s uncommon to peer a great blog like this one today..
Thanks a lot for sharing this with all folks you actually recognize what you’re talking about! Bookmarked. Please also talk over with my website =). We can have a hyperlink change agreement between us
Fastidious answers in return of this question with solid arguments and describing all about that.
PG Soft 2026 tá pagando recorde! Qual seu maior win dessa semana? Posta o print!
I’m gone to say to my little brother, that he should also pay a visit this blog on regular basis to take updated from latest gossip.
Mahjong Ways 2 cascade: quem já viu muitas quedas?
Your method of telling everything in this paragraph is actually pleasant, all can effortlessly understand it, Thanks a lot.
Wow, marvelous weblog layout! How lengthy have you been blogging for? you make blogging glance easy. The whole look of your website is great, let alone the content
Thanks designed for sharing such a fastidious thought, piece of writing is pleasant, thats why i have read it entirely
Excellent article. Keep posting such kind of information on your site. Im really impressed by it
Everything is very open with a precise description of the issues. It was truly informative. Your site is very useful. Many thanks for sharing!
We’re a group of volunteers and starting a new scheme in our community. Your web site provided us with valuable info to work on. You have done an impressive job and our entire community will be grateful to you.
Thank you for your sharing. I am worried that I lack creative ideas. It is your article that makes me full of hope. Thank you. But, I have a question, can you help me?
I’ve been exploring for a bit for any high-quality articles or blog posts on this sort of area . Exploring in Yahoo I ultimately stumbled upon this website. Reading this information So i’m satisfied to exhibit that I’ve a very excellent uncanny feeling I found out just what I needed. I such a lot certainly will make sure to don?t fail to remember this web site and give it a look regularly.
I’ve been surfing on-line more than 3 hours today, yet I never found any interesting article like yours. It’s pretty price enough for me. Personally, if all webmasters and bloggers made just right content as you probably did, the internet shall be much more helpful than ever before.
Do you have a spam problem on this blog; I also am a blogger, and I was wondering your situation; we have created some nice practices and we are looking to trade solutions with other folks, please shoot me an e-mail if interested.
Do you have a spam problem on this site; I also am a blogger, and I was wanting to know your situation; we have created some nice methods and we are looking to trade strategies with others, be sure to shoot me an e-mail if interested.
Every weekend i used to pay a visit this web page, for the reason that i want enjoyment, since this this web site conations in fact nice funny information too.
Excellent blog you have here but I was curious about if you knew of any forums that cover the same topics discussed in this article? I’d really love to be a part of group where I can get opinions from other experienced individuals that share the same interest. If you have any suggestions, please let me know. Thanks!
I’m not sure exactly why but this blog is loading very slow for me. Is anyone else having this issue or is it a problem on my end? I’ll check back later on and see if the problem still exists.
It’s appropriate time to make some plans for the future and it’s time to be happy. I have read this post and if I could I wish to suggest you some interesting things or tips. Maybe you could write next articles referring to this article. I desire to read more things about it!
Wow, that’s what I was seeking for, what a stuff! present here at this webpage, thanks admin of this web site.
Do you mind if I quote a few of your posts as long as I provide credit and sources back to your webpage? My blog is in the exact same area of interest as yours and my visitors would definitely benefit from some of the information you present here. Please let me know if this ok with you. Thanks a lot!
Amazing things here. I’m very satisfied to see your article. Thanks so much and I’m taking a look ahead to touch you. Will you please drop me a e-mail?
Hi! I’ve been reading your weblog for a while now and finally got the courage to go ahead and give you a shout out from Austin Tx! Just wanted to mention keep up the excellent work!
These are actually impressive ideas in about blogging. You have touched some good factors here. Any way keep up wrinting.
You actually make it seem so easy with your presentation but I find this topic to be really something which I think I would never understand. It seems too complicated and extremely broad for me. I’m looking forward for your next post, I will try to get the hang of it!
Hi to all, the contents existing at this web page are genuinely awesome for people experience, well, keep up the good work fellows.
When I originally commented I seem to have clicked the -Notify me when new comments are added- checkbox and now each time a comment is added I receive four emails with the exact same comment. There has to be a way you are able to remove me from that service? Thank you!
You really make it seem so easy with your presentation however I to find this matter to be really something which I think I would never understand. It sort of feels too complex and extremely vast for me. I am taking a look ahead in your subsequent submit, I will try to get the hold of it!
Hi to all, how is all, I think every one is getting more from this site, and your views are fastidious in support of new people.
Attractive section of content. I simply stumbled upon your blog and in accession capital to assert that I acquire in fact enjoyed account your weblog posts. Anyway I will be subscribing in your feeds and even I fulfillment you get admission to constantly fast.
obviously like your web site but you need to take a look at the spelling on quite a few of your posts. Several of them are rife with spelling issues and I find it very troublesome to tell the truth nevertheless I’ll certainly come back again.
Hi, its fastidious post on the topic of media print, we all understand media is a fantastic source of information.
Live streams of Fortune Mouse trended again thanks to the more dynamic broadcast feel.
Players who alternated Fortune Dragon and Wild Bandito reported more balanced sessions.
Treasures of Aztec in turbo mode demands risk control from the start.
Hey there! This is kind of off topic but I need some guidance from an established blog. Is it difficult to set up your own blog? I’m not very techincal but I can figure things out pretty fast. I’m thinking about setting up my own but I’m not sure where to begin. Do you have any tips or suggestions? Many thanks
I truly love your website.. Excellent colors & theme. Did you make this amazing site yourself? Please reply back as I’m looking to create my own personal site and would like to find out where you got this from or exactly what the theme is called. Kudos!
I was excited to uncover this website. I want to to thank you for ones time due to this fantastic read!! I definitely enjoyed every part of it and i also have you bookmarked to check out new information on your blog.
It’s in fact very complex in this active life to listen news on TV, so I just use the web for that reason, and take the hottest information.
Heya exceptional website! Does running a blog such as this require a great deal of work? I’ve no understanding of computer programming but I had been hoping to start my own blog soon. Anyways, should you have any suggestions or tips for new blog owners please share. I understand this is off topic however I just wanted to ask. Thank you!
Great weblog right here! Additionally your web site rather a lot up fast! What host are you using? Can I am getting your affiliate link for your host? I want my web site loaded up as fast as yours lol
you’re really a good webmaster. The site loading speed is amazing. It seems that you are doing any unique trick. Also, The contents are masterwork. you have performed a magnificent job in this topic!
Your style is so unique in comparison to other people I’ve read stuff from. Thanks for posting when you have the opportunity, Guess I’ll just bookmark this page.
Hello, after reading this remarkable piece of writing i am too cheerful to share my knowledge here with colleagues.
Pretty! This has been an incredibly wonderful article. Many thanks for providing this information.
Hmm it seems like your blog ate my first comment (it was extremely long) so I guess I’ll just sum it up what I had written and say, I’m thoroughly enjoying your blog. I too am an aspiring blog blogger but I’m still new to the whole thing. Do you have any tips and hints for first-time blog writers? I’d definitely appreciate it.
Your article helped me a lot, is there any more related content? Thanks!
I am sure this article has touched all the internet people, its really really fastidious paragraph on building up new website.
You actually make it seem so easy with your presentation but I find this matter to be actually something that I think I would never understand. It seems too complex and extremely broad for me. I am looking forward for your next post, I’ll try to get the hang of it!
This is very interesting, You’re a very skilled blogger. I have joined your rss feed and look forward to seeking more of your magnificent post. Also, I have shared your site in my social networks!
Excellent article. Keep posting such kind of information on your site. Im really impressed by your blog
Greetings! Very helpful advice in this particular article! It is the little changes that produce the biggest changes. Thanks a lot for sharing!
Very good information. Lucky me I ran across your site by chance (stumbleupon). I have saved as a favorite for later!
Thanks for ones marvelous posting! I really enjoyed reading it, you will be a great author.I will make certain to bookmark your blog and may come back down the road. I want to encourage yourself to continue your great job, have a nice afternoon!
Thanks for any other fantastic article. Where else may anyone get that type of information in such a perfect way of writing? I’ve a presentation next week, and I am on the search for such info.
Pretty section of content. I simply stumbled upon your weblog and in accession capital to claim that I acquire actually loved account your blog posts. Any way I’ll be subscribing in your feeds or even I fulfillment you get right of entry to consistently quickly.
I’ll right away take hold of your rss as I can not in finding your e-mail subscription link or e-newsletter service. Do you’ve any? Please permit me recognize in order that I could subscribe. Thanks.
Hello there, simply become alert to your weblog via Google, and located that it’s truly informative. I am gonna be careful for brussels. I will be grateful should you continue this in future. A lot of people can be benefited from your writing. Cheers!
We are a group of volunteers and opening a new scheme in our community. Your web site provided us with valuable info to work on. You have done a formidable job and our whole community will be thankful to you.
Very neat blog post.Really looking forward to read more. Awesome.
I was recommended this website by my cousin. I’m not sure whether this post is written by him as no one else know such detailed about my trouble. You’re amazing! Thanks!
Hey there, You’ve done a great job. I’ll certainly digg it and individually recommend to my friends. I’m confident they will be benefited from this website.
Hi there, You’ve performed a great job. I’ll certainly digg it and personally recommend to my friends. I’m sure they will be benefited from this web site.
Highly descriptive blog, I enjoyed that bit. Will there be a part 2?
Wow, that’s what I was seeking for, what a material! present here at this weblog, thanks admin of this site.
UpvoteRocket is the #1 automated voting service for private MMORPG servers. Climb toplist rankings on XtremeTop100, TopG, GTop100 with smart undetectable automation. Ragnarok, WoW, Mu Online & 20+ platforms supported. Pay only for delivered votes.
It’s in reality a nice and useful piece of information. I am satisfied that you shared this helpful information with us. Please stay us up to date like this. Thank you for sharing.
Your point of view caught my eye and was very interesting. Thanks. I have a question for you.
Sweet blog! I found it while surfing around on Yahoo News. Do you have any suggestions on how to get listed in Yahoo News? I’ve been trying for a while but I never seem to get there! Thanks
Bom dia, guia prático e sem firula copa do mundo 2026. jogo responsável odds estão boas. Sucesso!
Eae. Comprei strategia com cassino novo porém tem que ter paciência.
Qué tal, guía directa al grano. crash games
I really love your site.. Great colors & theme. Did you develop this web site yourself? Please reply back as I’m planning to create my very own blog and want to know where you got this from or exactly what the theme is named. Many thanks!
Tremendous things here. I am very happy to peer your post. Thank you a lot and I’m looking ahead to contact you. Will you please drop me a e-mail?
I do not even know how I ended up here, but I thought this post was great. I don’t know who you are but certainly you are going to a famous blogger if you are not already 😉 Cheers!
Hi my loved one! I want to say that this post is amazing, nice written and include approximately all important infos. I would like to look more posts like this .
you are really a just right webmaster. The site loading velocity is incredible. It seems that you’re doing any unique trick. Furthermore, The contents are masterpiece. you have done a wonderful process on this topic!
Great items from you, man. I’ve be aware your stuff previous to and you are just too fantastic. I actually like what you have received right here, certainly like what you’re stating and the best way through which you are saying it. You’re making it enjoyable and you continue to take care of to stay it sensible. I cant wait to learn far more from you. This is actually a tremendous website.
Excellent article! We will be linking to this great article on our site. Keep up the good writing.
Your article helped me a lot, is there any more related content? Thanks!
It is appropriate time to make some plans for the future and it’s time to be happy. I have read this post and if I could I desire to suggest you few interesting things or suggestions. Maybe you can write next articles referring to this article. I wish to read even more things about it!
The captain pick that nobody saw coming but delivered a 12x multiplier in the final.
Legal, transparent, and player-friendly — understanding Dream11’s operating model in India.
Hello there, You’ve performed a great job. I will certainly digg it and in my opinion recommend to my friends. I’m confident they’ll be benefited from this site.
Hello! I know this is kind of off topic but I was wondering if you knew where I could find a captcha plugin for my comment form? I’m using the same blog platform as yours and I’m having problems finding one? Thanks a lot!
Our platform maintains the latest versions of all applications.